You may use any IDE. We'll use a lightweight editor, VS Code. If you're not using VS Code, perform similar steps using your IDE.
Use VSCode
- Select the latest Java Development Kit (JDK) for your operating system from Oracle: Java Downloads.
- Follow the instructions to install it on your machine.
- Download the package for your machine: Visual Studio Code Download.
- Follow the instructions to install it.
Install some VS Code extensions to make it easier to develop Java.
- In VS Code, select the 'Extensions' icon on the left, and search for and install the following
extensions:
- MS Extension Pack for Java
- UMLet (for drawing UML diagrams)
- In VS Code, open the command palette (⇧⌘P) or (Ctrl-Shift-P) and type 'java tips' to get started.


Visit Java in Visual Studio Code for more help.
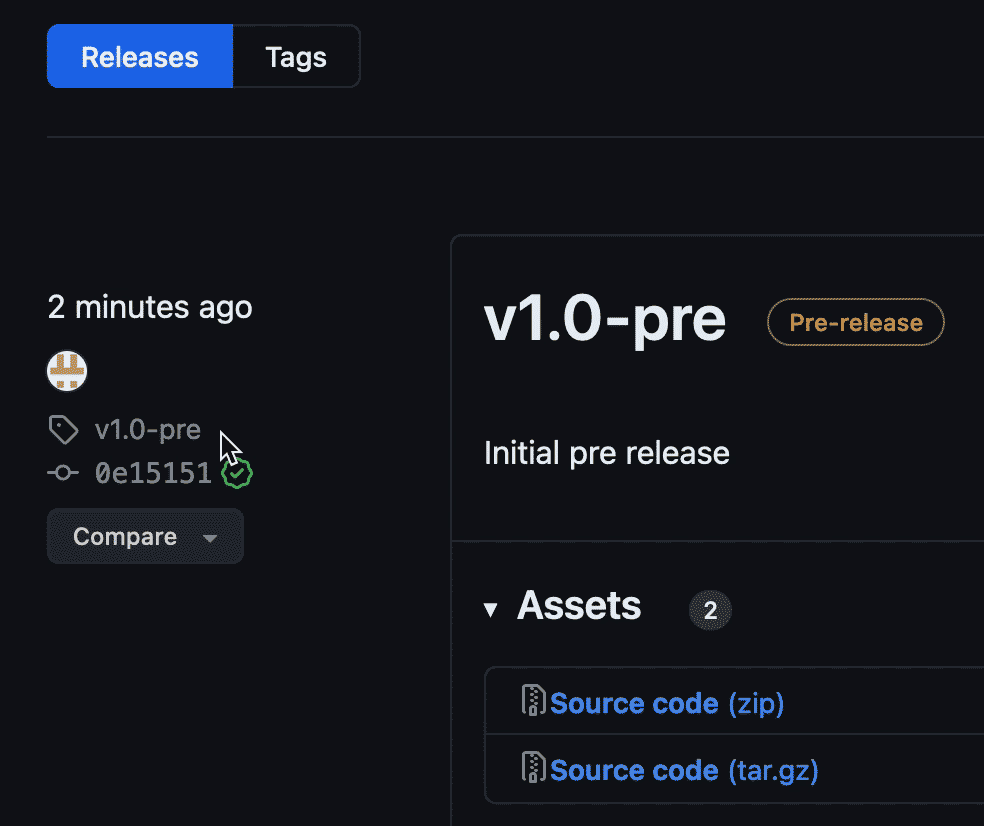
- In a browser, visit https://github.com/krish-pillai/jetdog-distro.git
- Find the latest release of the game engine framework and download the Source code .zip file to your machine.
- Unzip the file by double clicking it.
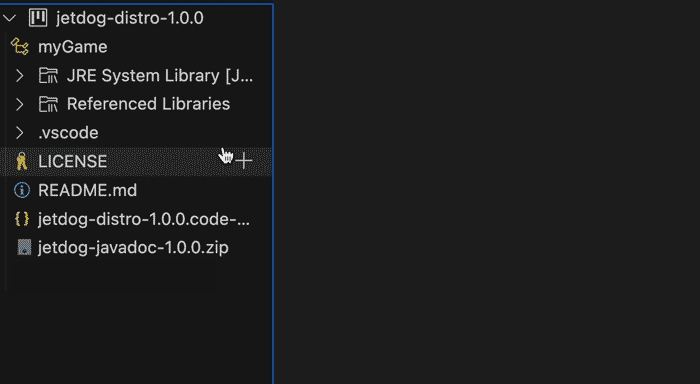
- Open VS Code, select 'Open', and find and select the jetdog-distro-x.x.x folder that you unzipped.
- Select 'File', 'New File' to create a new java file
(or select
 ).
Name your first game 'myGame.java'.
).
Name your first game 'myGame.java'.

- Open the command palette (⇧⌘P) or (Ctrl-Shift-P) and type 'configure classpath'.
- Let VS Code know where to find your source and build files.


You may also need to configure the Java runtime JDK.
- In VS Code, under Java Projects, right click on Referenced Libraries.
- Find the jetdog-lib-x.x.x.jar file and select it.
- Open your myGame.java file, add a main() method:
and select 'Run'. Voila, your environment is now ready to go!public class myGame { public static void main(String[] args) { System.out.println(“My First JetDog Program.”); } }
(Or click the '+' next to Referenced Libraries and select the jetdog-lib-x.x.x.jar file.)

- Select 'File', 'Save Workspace As', and give your workspace a name.